1.8 Setup Local Runtime
Get Started

What is a Local Runtime?
A Local Runtime connects Drylab's interface to your own machine instead of a cloud instance. Your prompts, code, and notebooks run on your local CPU/GPU using your own resources — Drylab acts as the frontend while your machine does the computation.
Best for:
Working with sensitive/private data that cannot leave your machine
Using your own GPU (NVIDIA workstation, MacBook M-series)
Large datasets already stored locally
Avoiding cloud compute costs for long-running jobs
Prerequisites
Before setting up, ensure your local machine has:
Python 3.8 or higher
pip or conda package manager
Jupyter or JupyterLab installed
Sufficient RAM for your analysis (8GB minimum recommended)
Internet connection (for Drylab UI to connect)
Local vs Cloud Runtime Comparison
Local Runtime | Cloud Runtime | |
|---|---|---|
Compute | Your machine | Drylab cloud instance |
Cost | No compute credits | Uses compute credits |
Data privacy | Data stays on your machine | Data in Drylab Vault |
Setup required | Yes (one-time) | None |
GPU support | Your local GPU | T4 Small (cloud GPU) |
File access | Local filesystem | Vault ( |
Scalability | Limited to your hardware | Scale up instance type |
Availability | Machine must be on | Always available |
When to Use Each
Situation | Use |
|---|---|
Sensitive patient data (must stay local) | Local Runtime |
Large local dataset (>50GB, costly to upload) | Local Runtime |
You have a powerful local GPU | Local Runtime |
Quick cloud analysis, no local setup | Cloud Runtime |
Sharing work with a team | Cloud Runtime |
Reproducible pipeline submission | Cloud Runtime |
How to setup
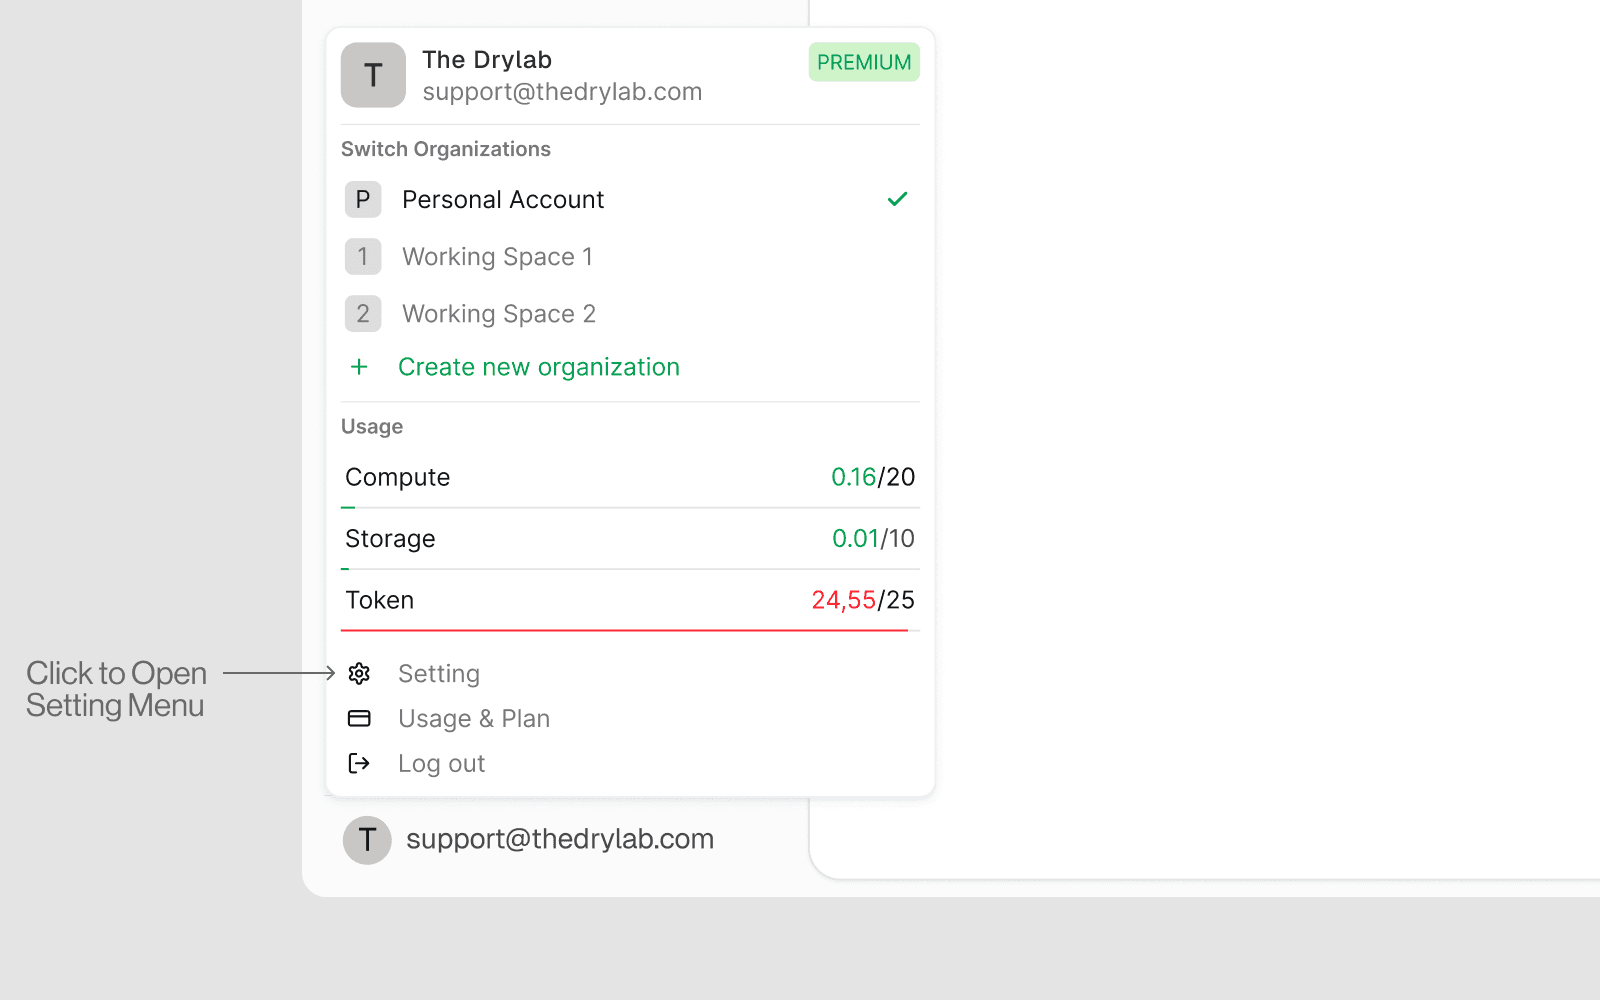
1. Open Setting
Click your profile icon or avatar in the top-right corner of Drylab
Select Settings from the dropdown menu
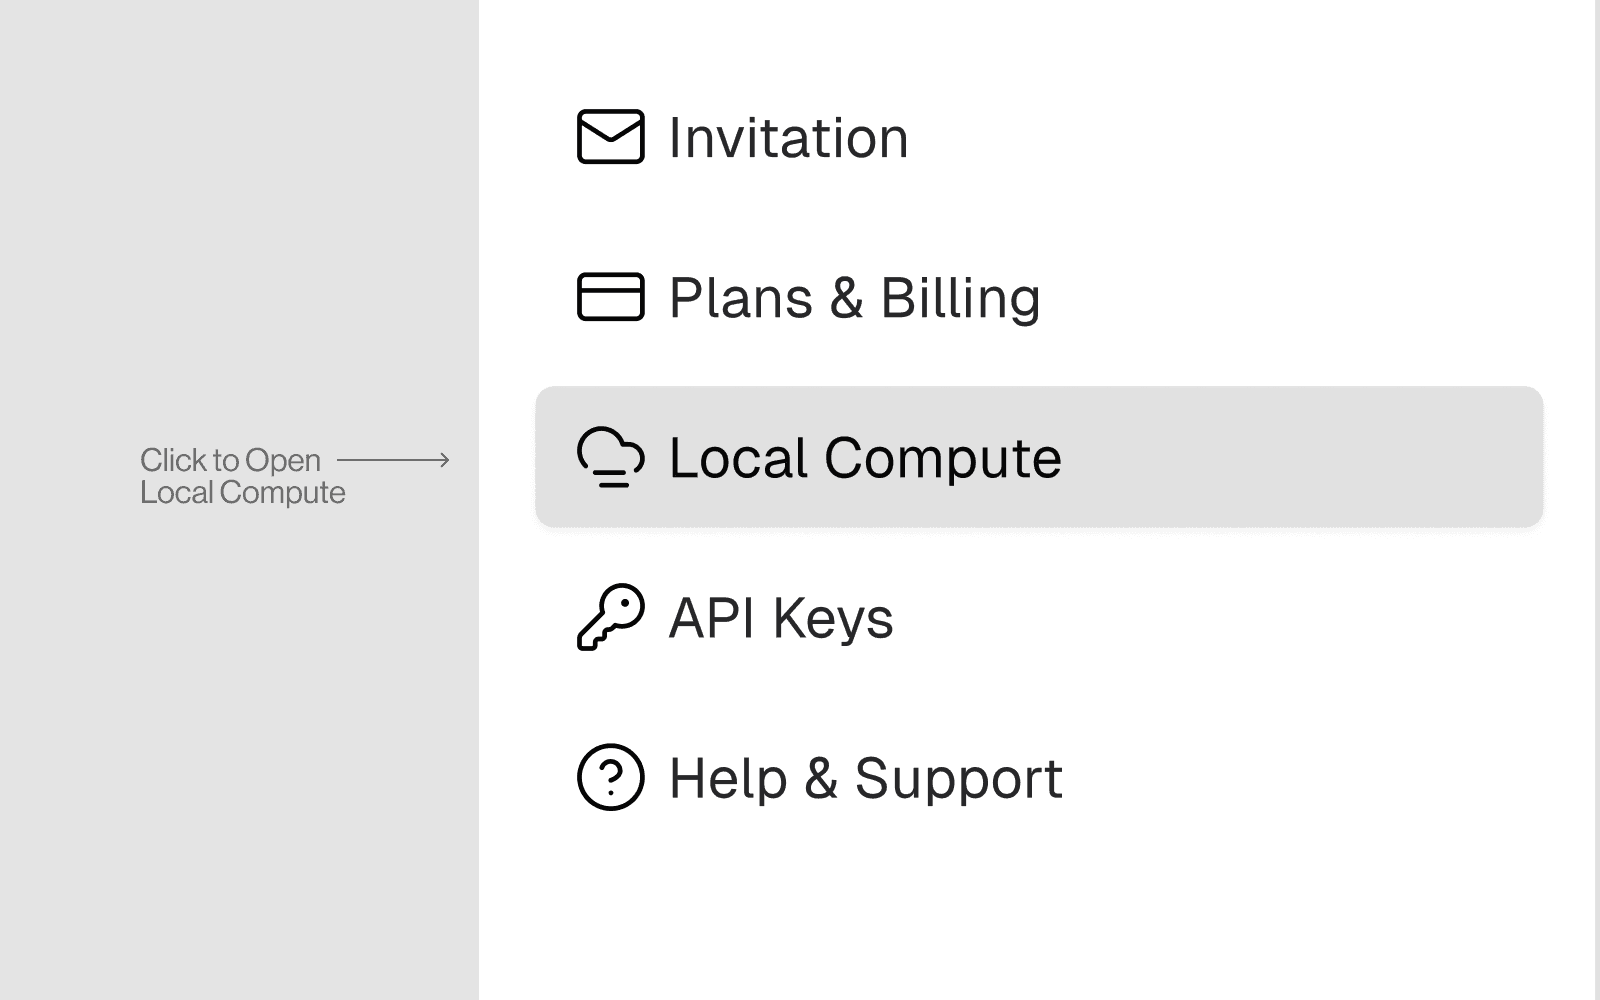
Navigate to the Compute or Runtime tab
Look for the Local Compute or Local Runtime section
2. Go to the Local Compute Section
In Settings > Compute > Local Compute, you will see:
Current connection status (Connected / Disconnected)
Your Runtime ID (auto-generated)
Installation instructions
A Connect button
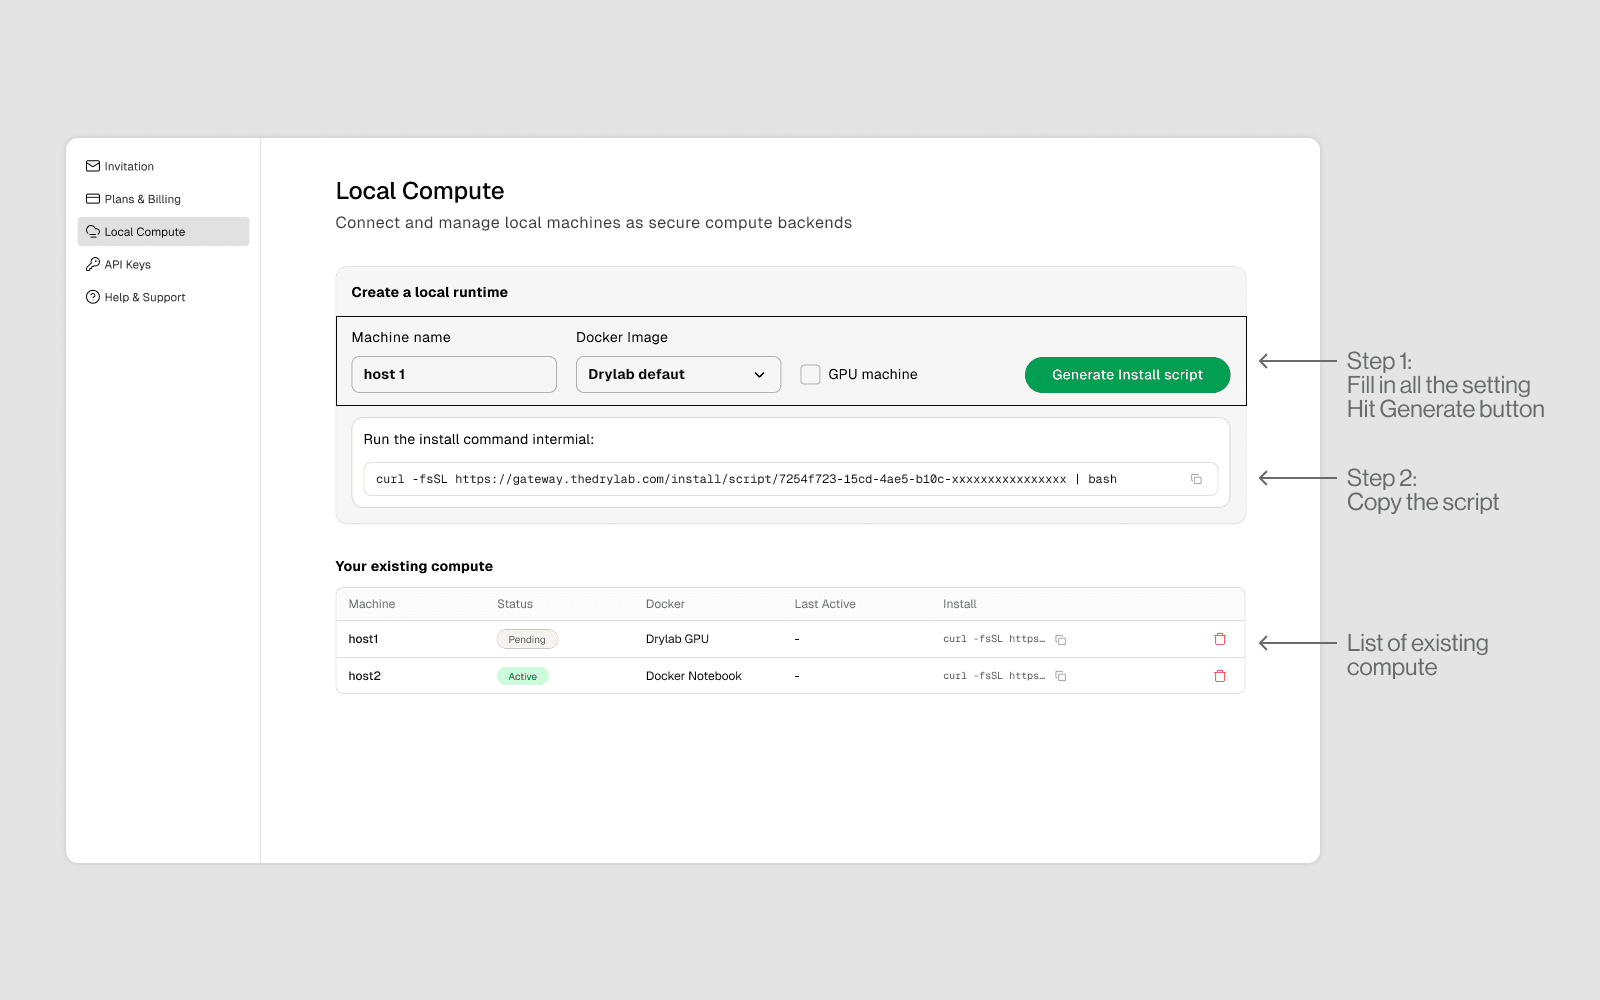
3. Install the Runtime on Your Machine
The settings panel provides a one-line install command. Copy and run it in your local terminal:
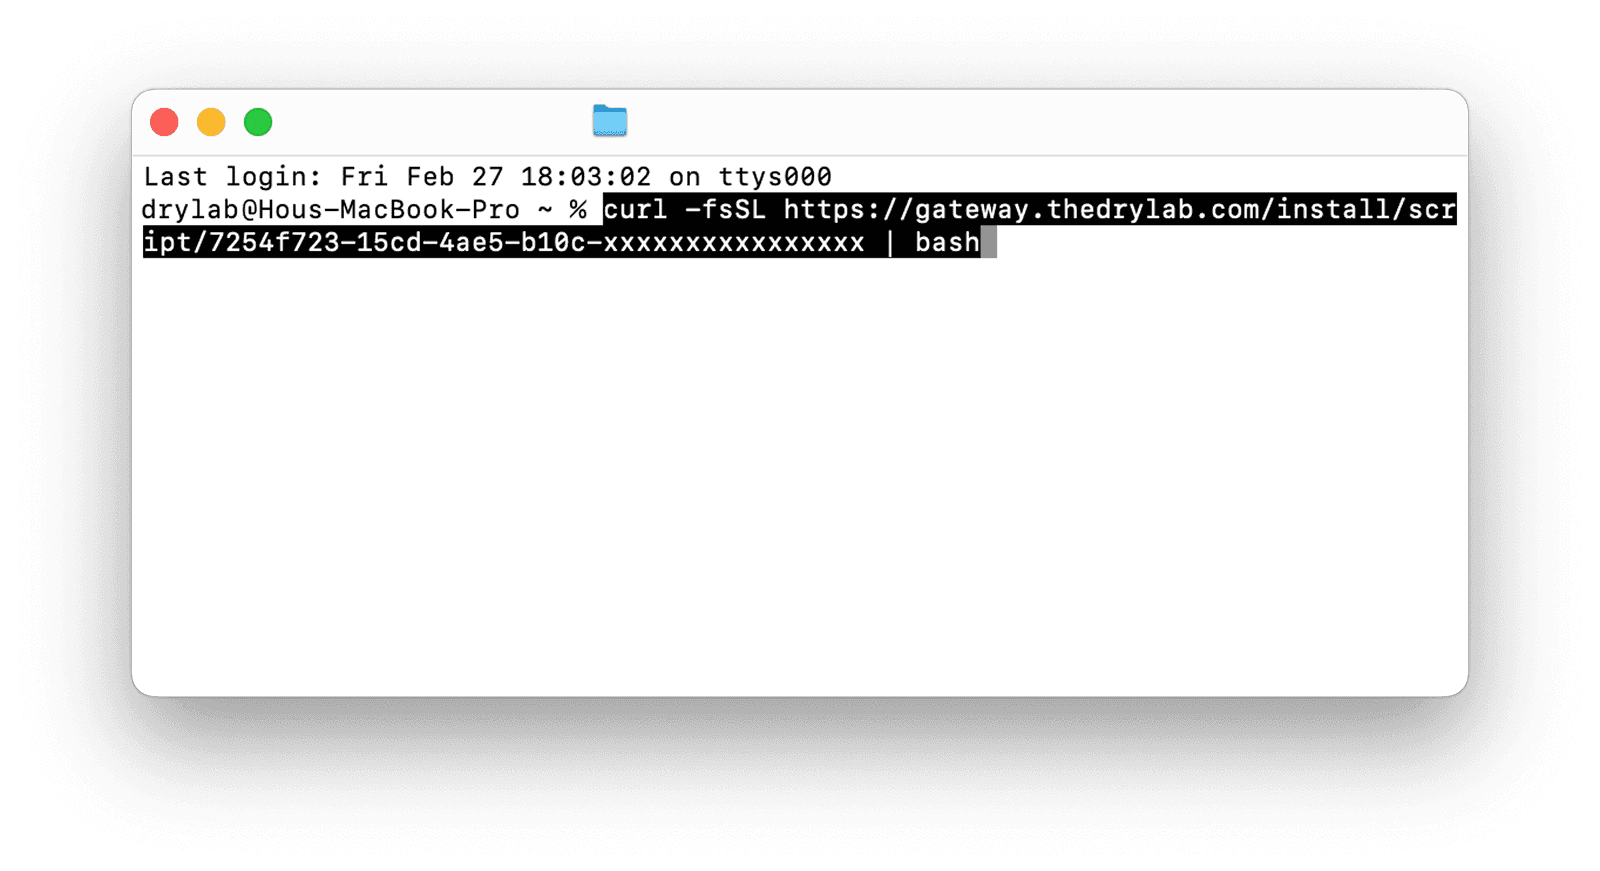
4. Register in Settings
Back in Settings > Compute > Local Compute:
Click Add Local Machine
Enter a display name for your machine (e.g.
My Workstation,Lab GPU Server)Paste the Runtime ID shown in your terminal
Click Connect
Status changes to Connected with a green indicator
Switching Between Local and Cloud in a Session
You do not need to go to Settings every time. In any active analysis:
Click the instance selector (shown in the top bar of the session)
A dropdown shows:
Click your local machine to switch
The session restarts on your local machine — Vault files are preserved
