1.13 How to work with Drylab Discovery
Get Started

What is Drylab Discovery
Drylab Discovery is an AI research assistant for data science. You describe a problem and give it your data; the AI then automatically builds, tests and improves many candidate solutions for you — and explains what it found in plain language. You stay in control by chatting with it and steering the search.
The 4 things you'll do most
• Create a Project — tell the AI your goal and upload data.
• Run a Discovery — let the AI explore solutions automatically.
• Review results — see the best models in a tree, table or chart.
• Steer with chat — ask questions and guide the next experiments.
TIP: Think of it like a tireless junior researcher: you give direction, it does the heavy lifting and reports back.
The Discovery Engine is where the AutoML work happens — it holds all your projects. You can reach it any time from the left sidebar.
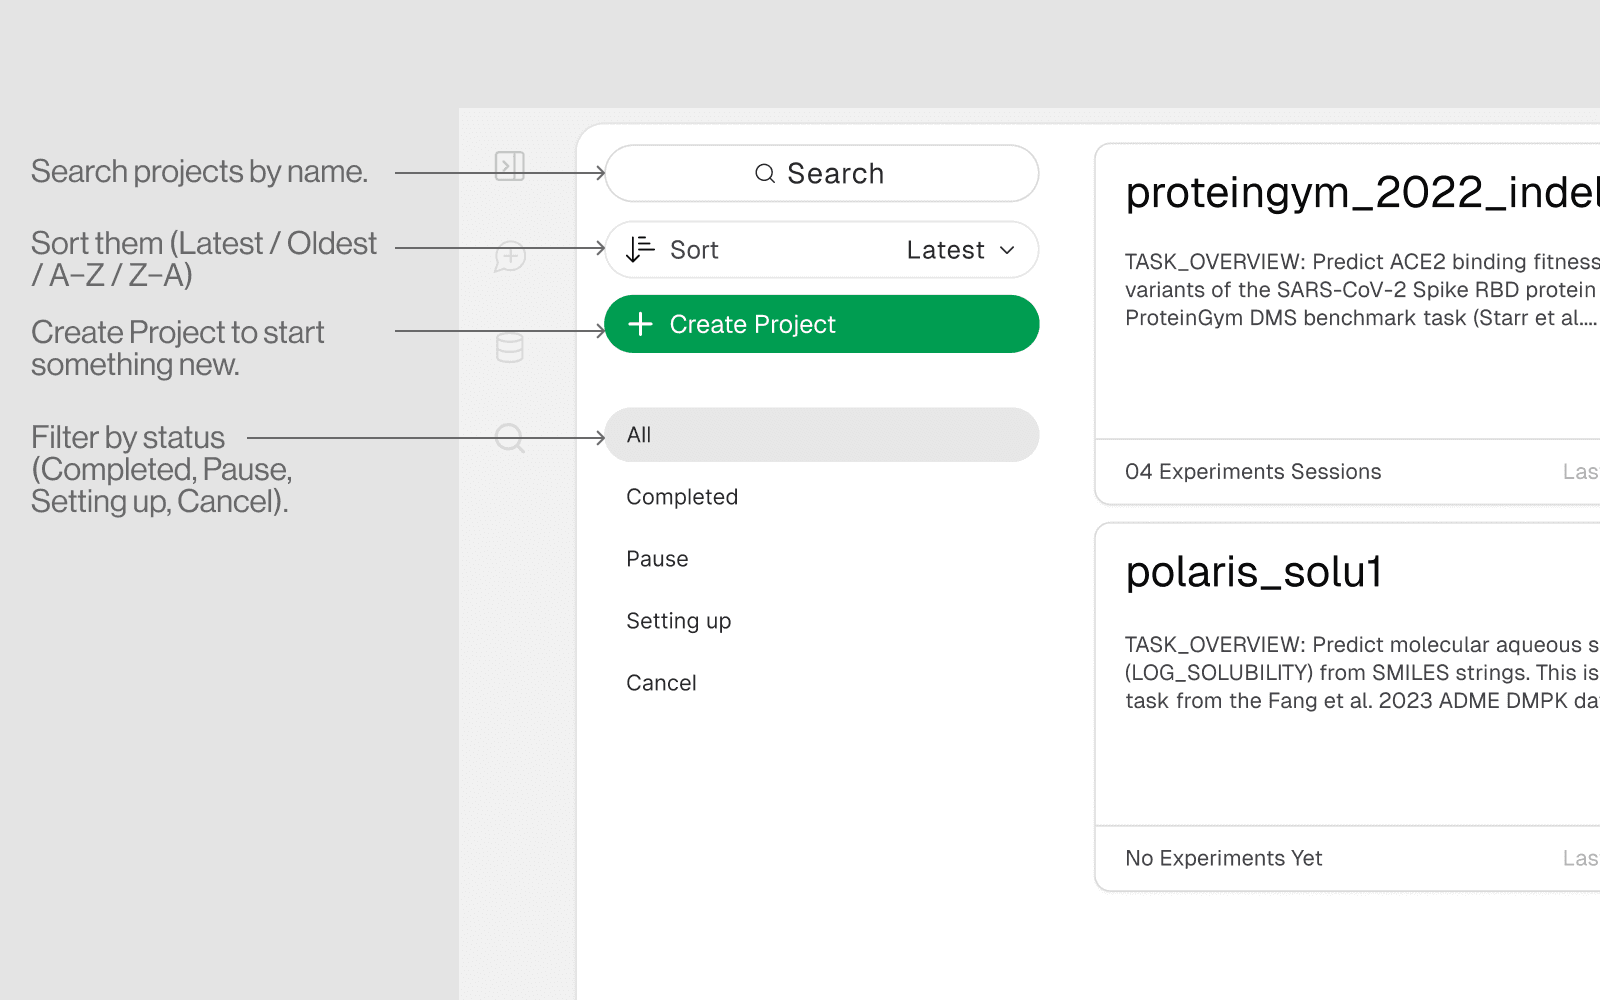
On this page you can:
• Search projects by name.
• Sort them (Latest / Oldest / A–Z / Z–A).
• Filter by status (Completed, Pause, Setting up, Cancel).
• Create Project to start something new.
A project holds your goal, your data and all the experiments the AI runs for it. Click Create Project on the Discovery Engine and follow the 5 short steps below — each screenshot shows exactly what you'll see.
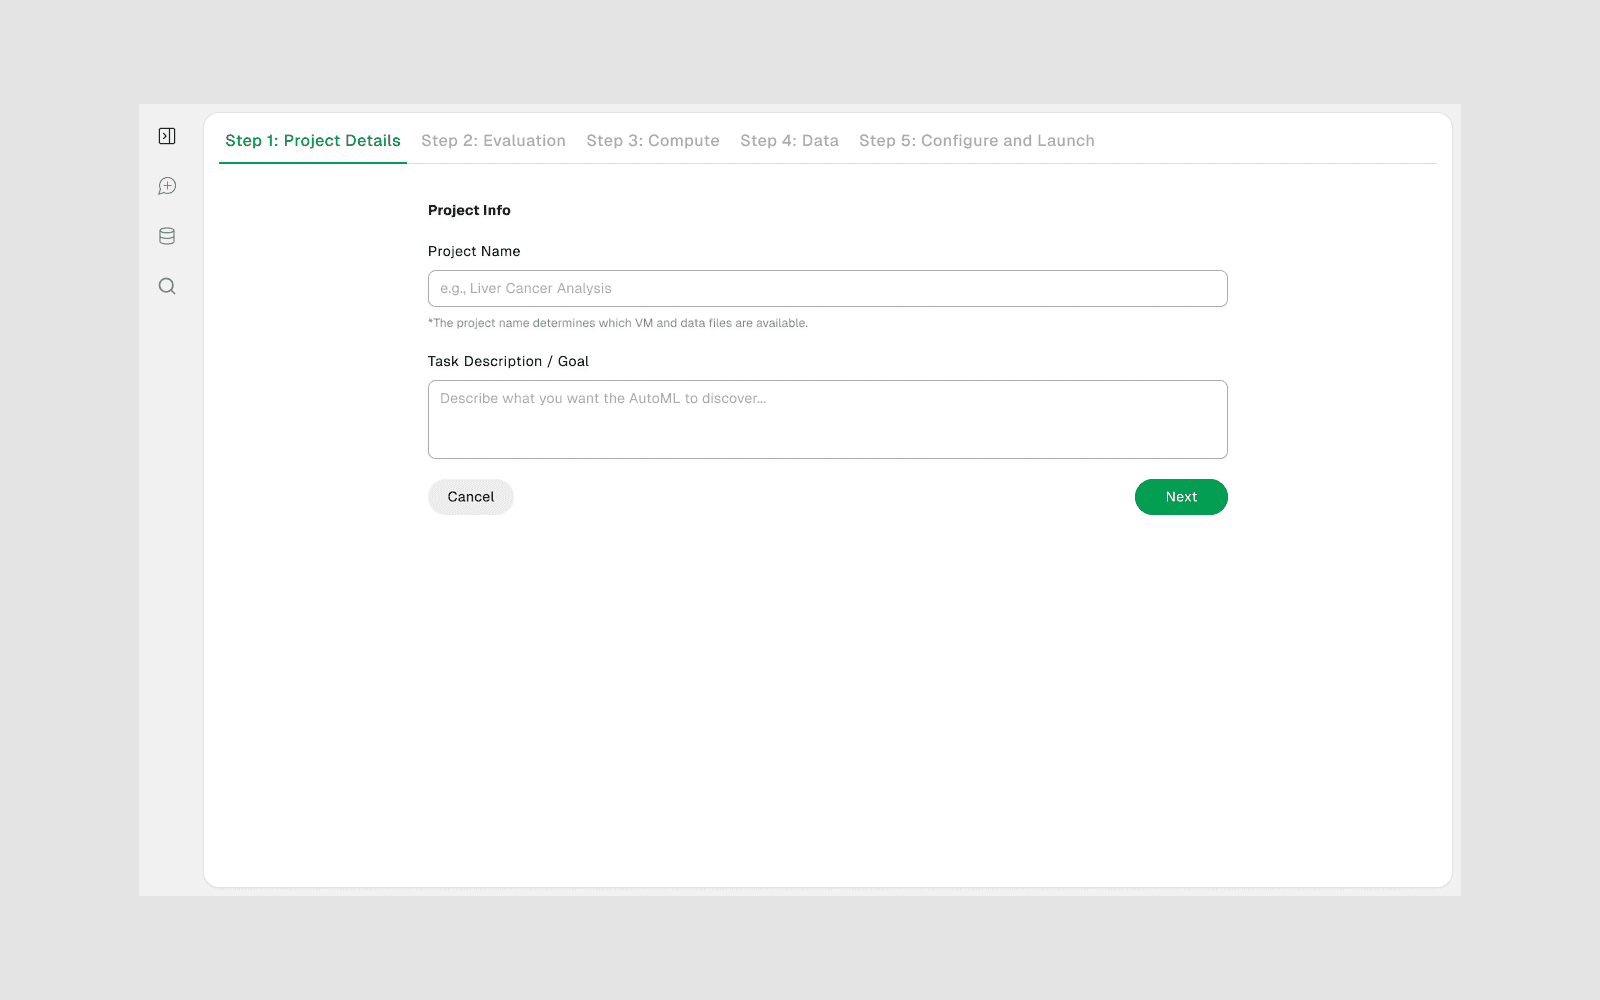
Step 1 — Project details
Give it a name and describe your task in plain English (e.g. “Predict the flower species from these measurements”).
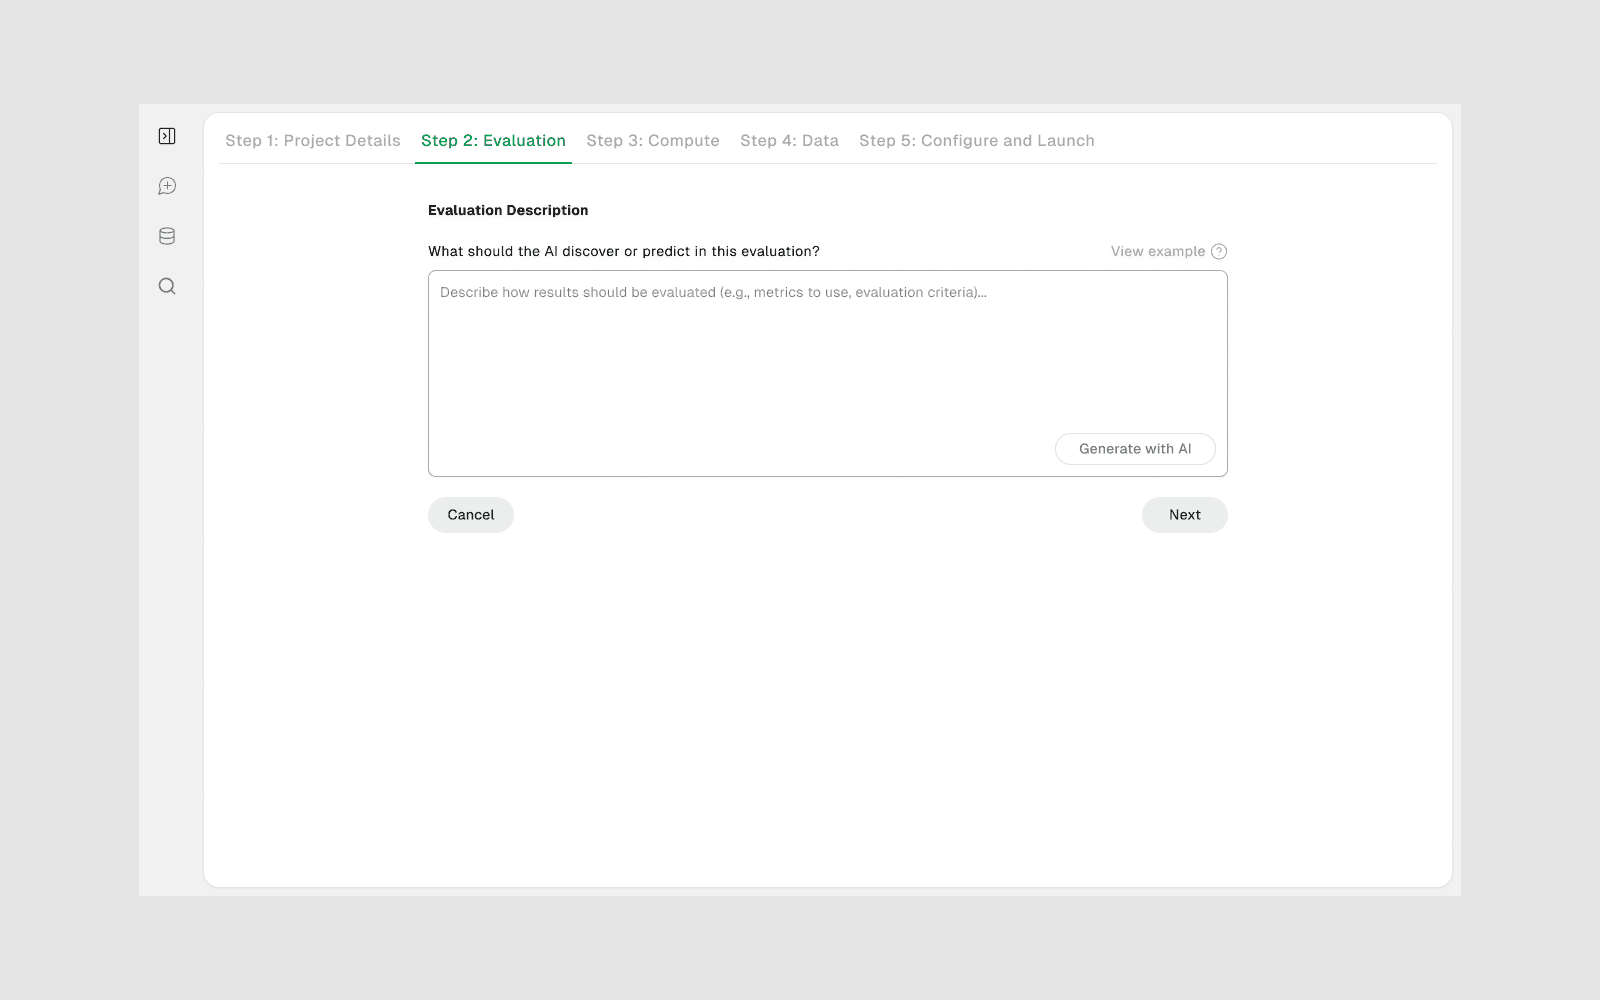
Step 2 — Evaluation
Tell it how to measure success. Not sure? Click Generate with AI and it will suggest a sensible metric for you.
Step 3 — Compute
Pick where it runs. CPU options are fine for most tasks; choose a GPU for heavy/deep-learning work.

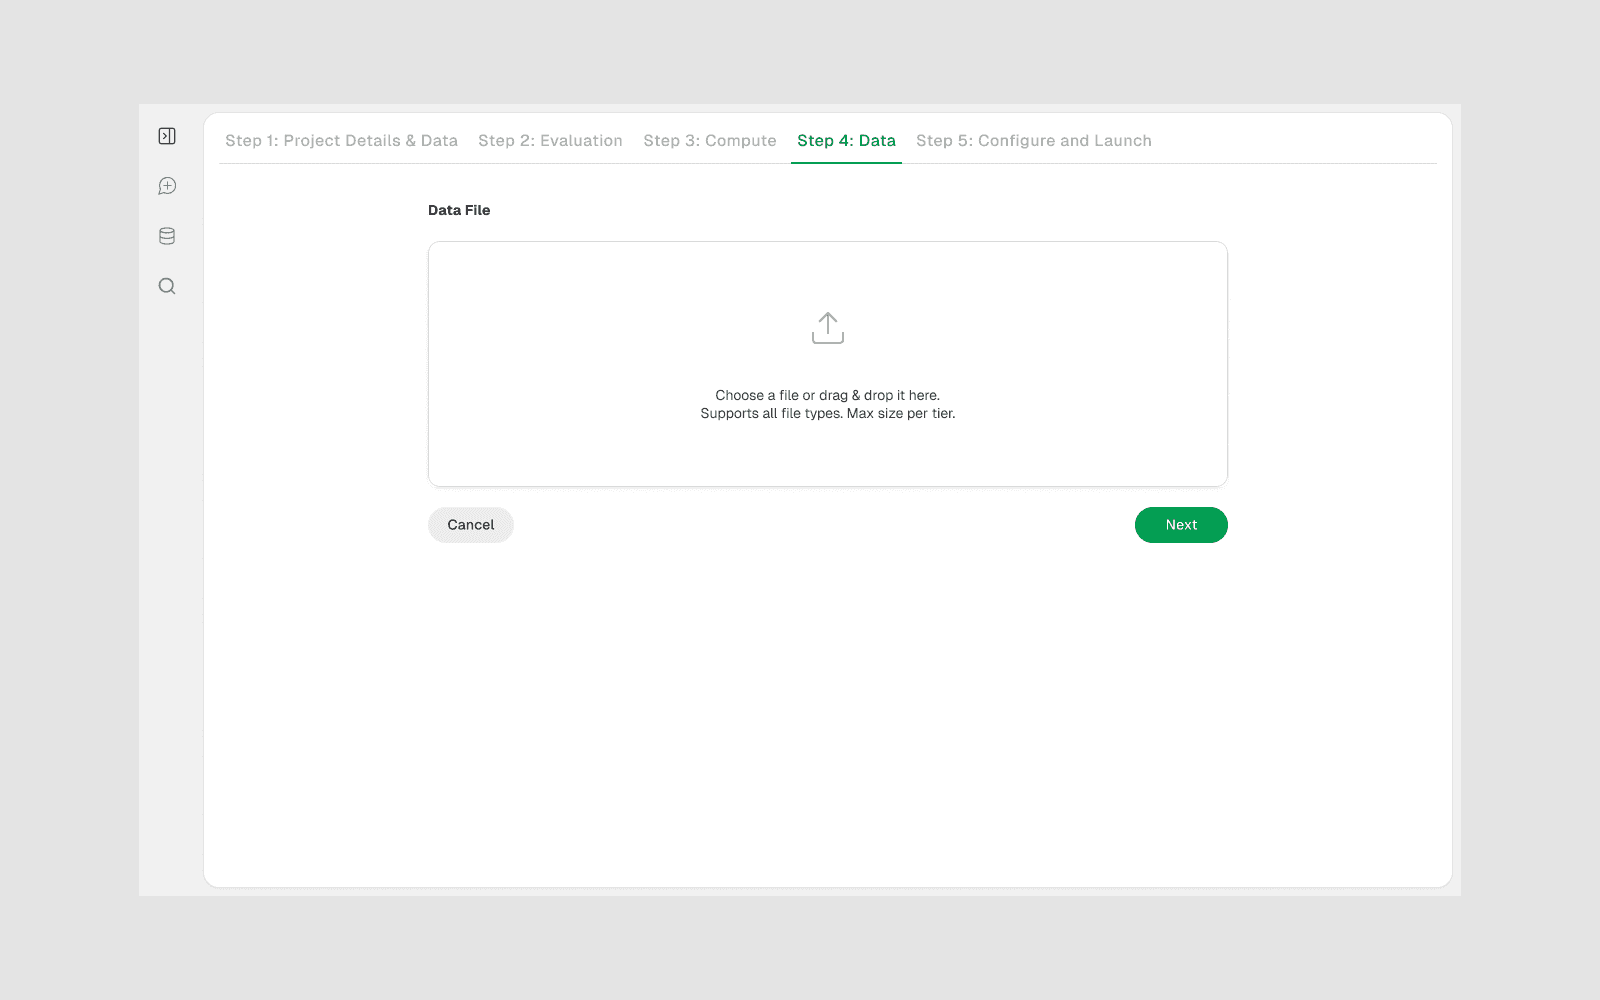
Step 4 — Data
Drag and drop your data file (e.g. a CSV) into the upload area.
Step 5 — Review the configuration, then launch
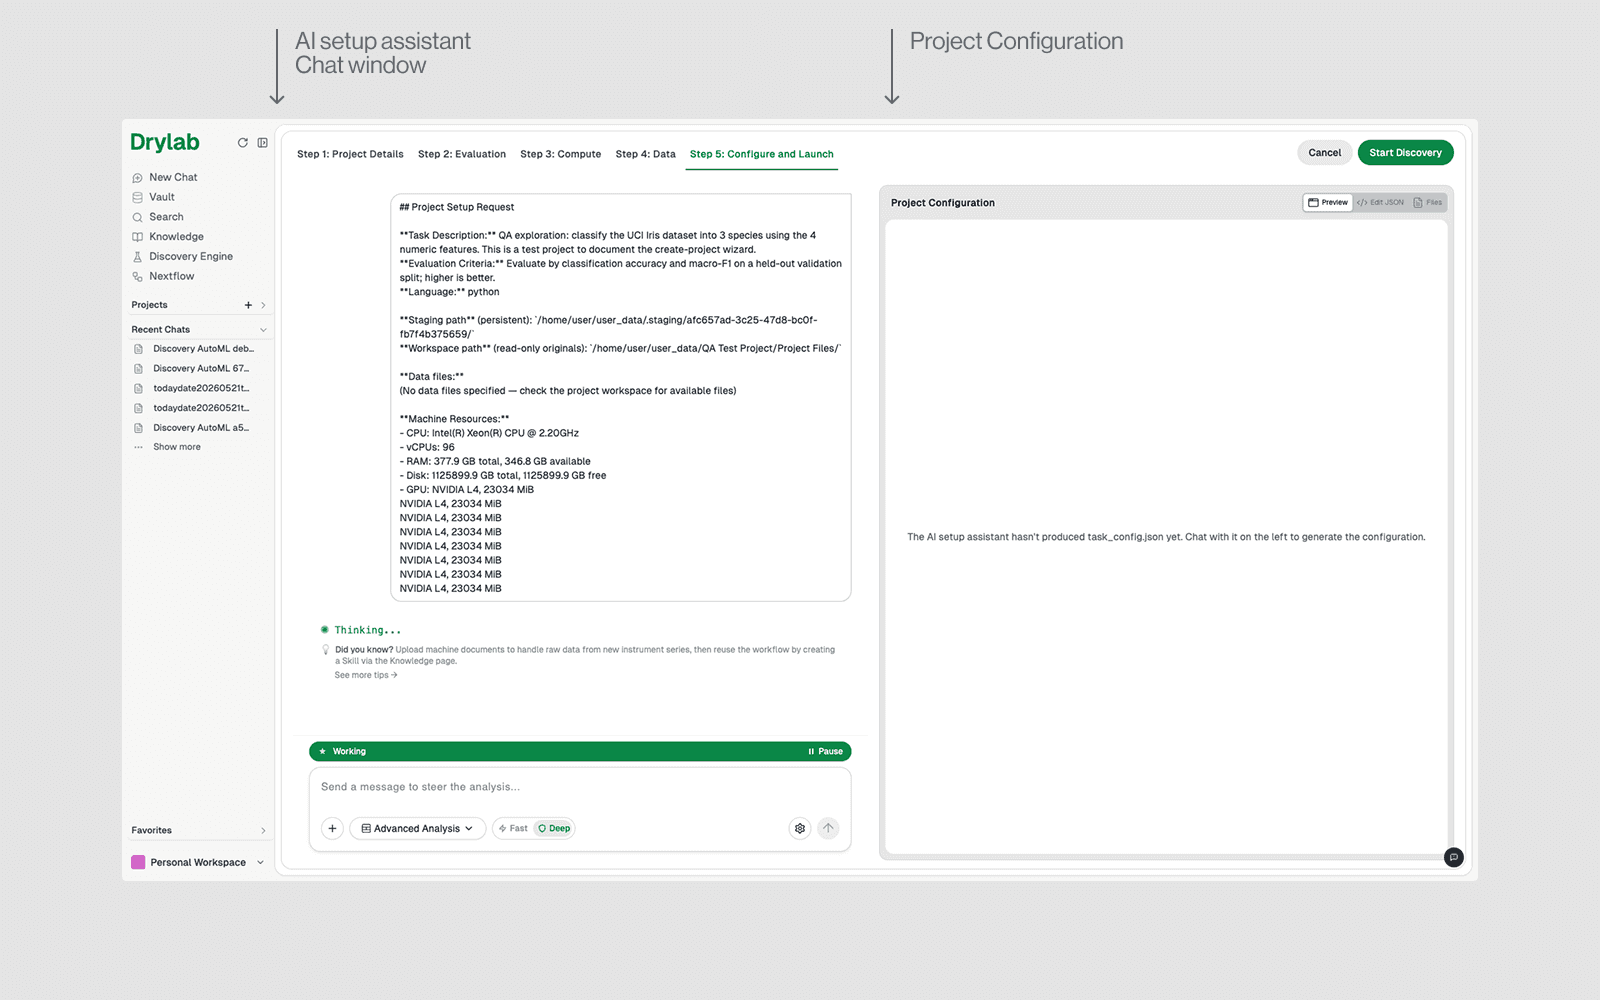
This is the most important step. An AI setup assistant inspects your data and writes a Project Configuration for you (task description, optimization metric, metric direction, scoring metrics, evaluation script, and more). Don't rush — follow this loop, illustrated below:
1. Wait for the configuration to appear on the right. While the assistant is “Thinking… / Working…” the panel says it hasn't produced the config yet.
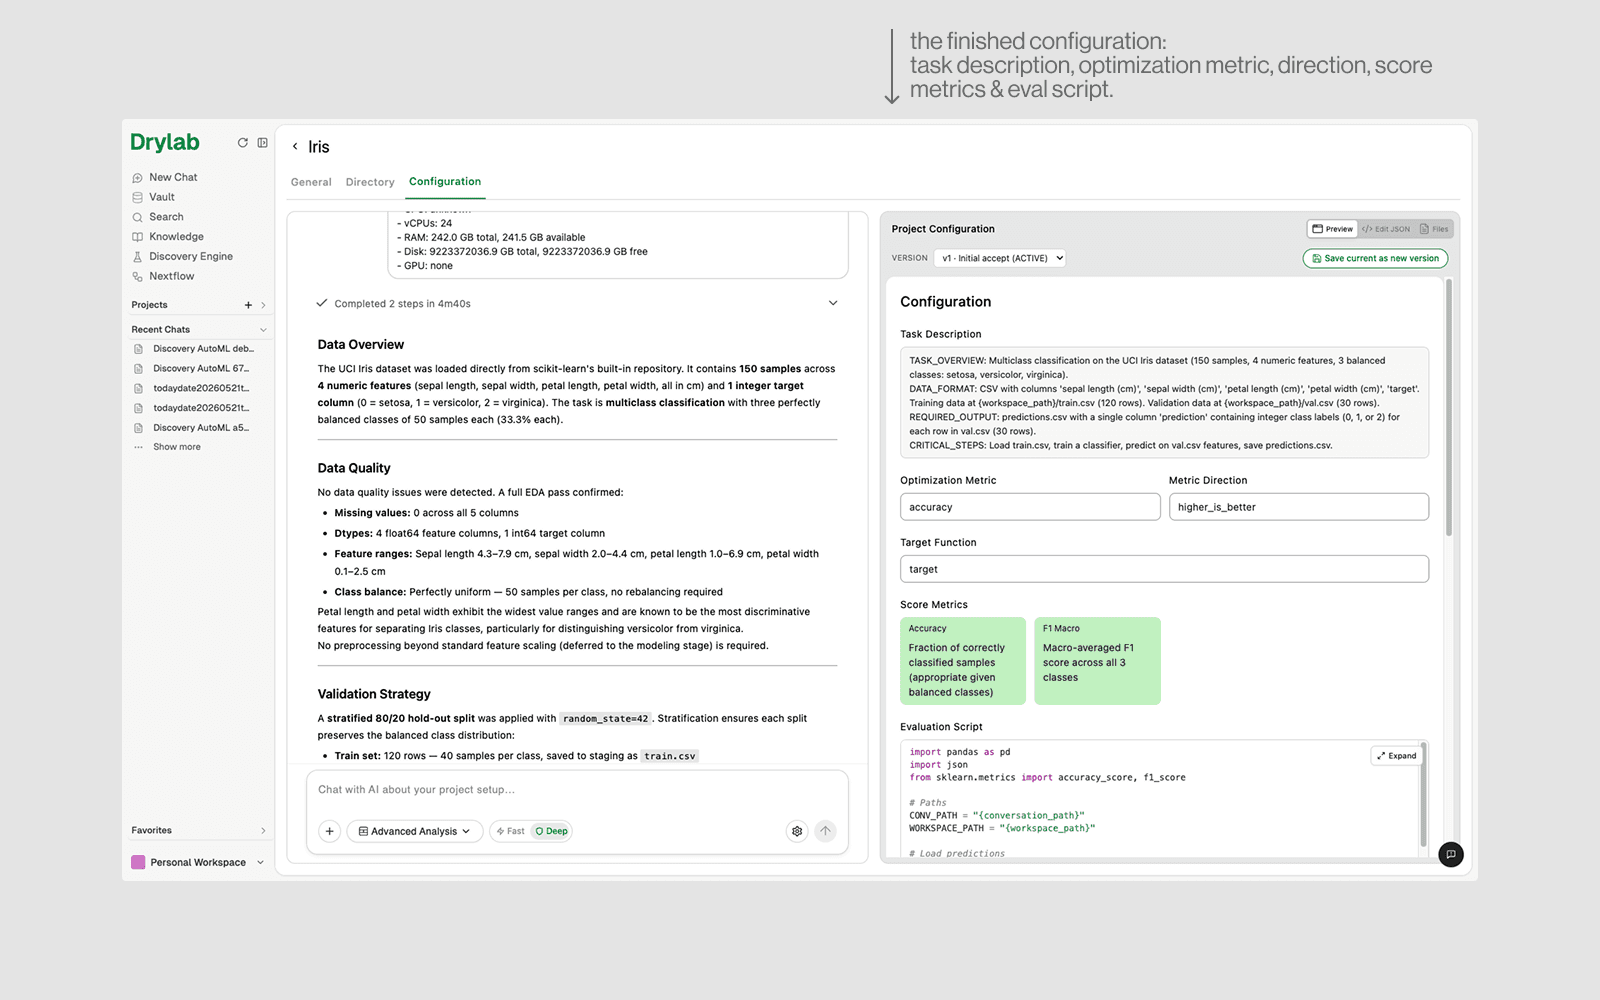
2. Review the generated configuration carefully — check the task description, optimization metric, metric direction and scoring all match what you want.
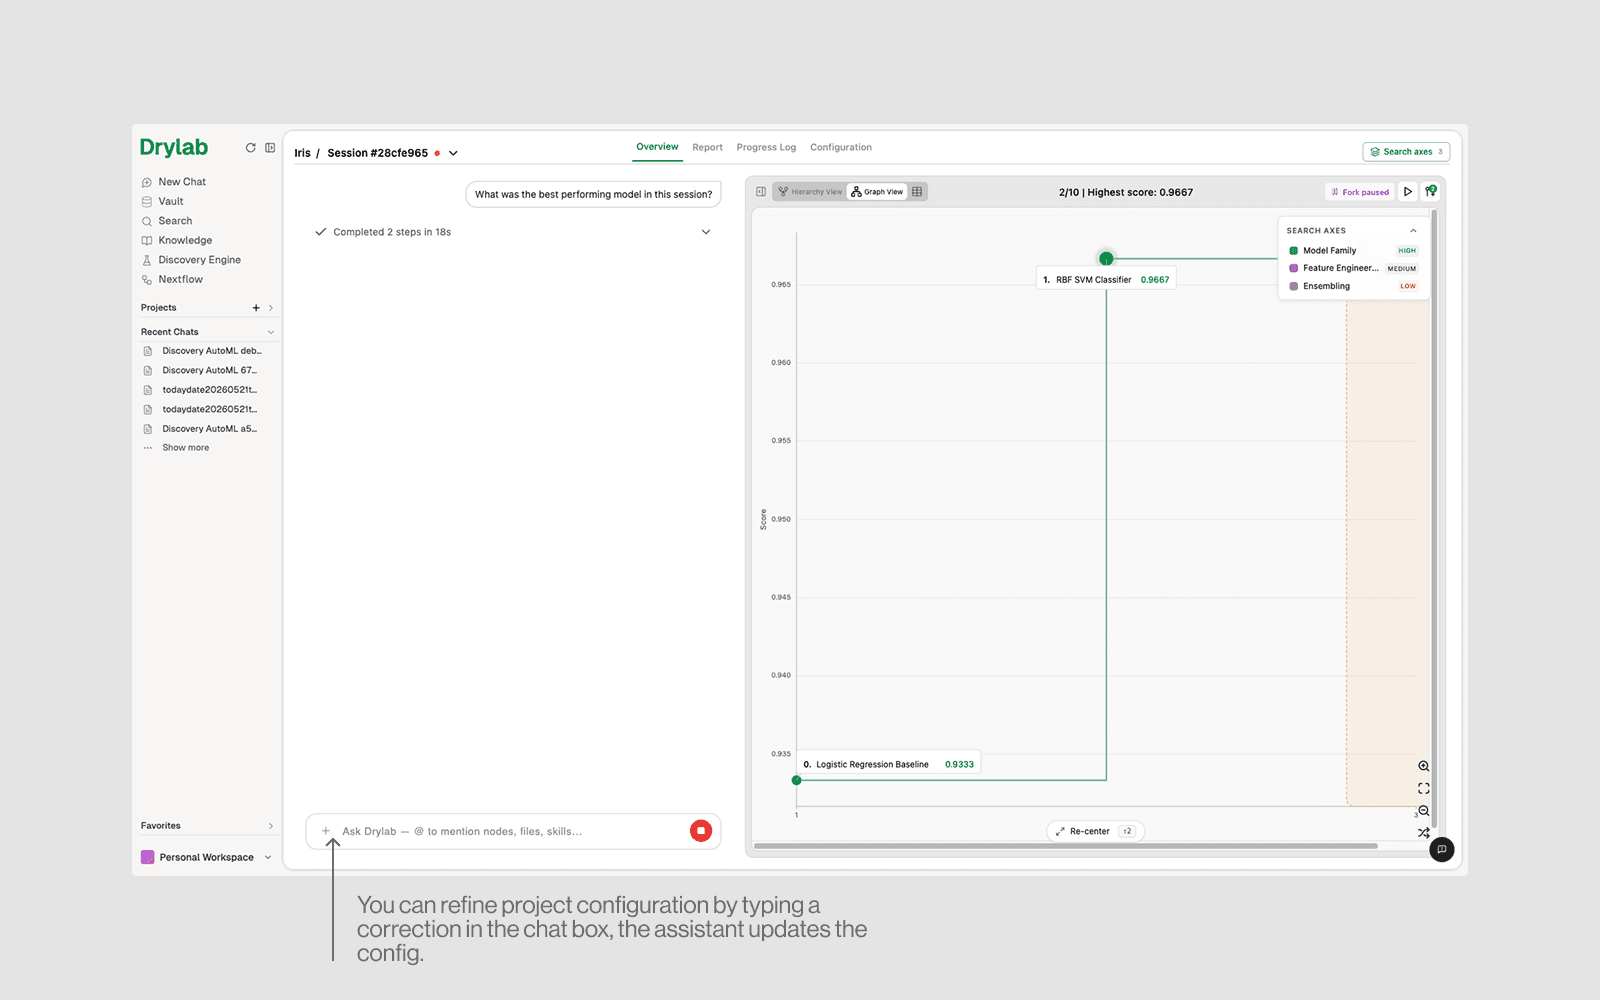
3. If something is wrong, refine it via chat on the left (e.g. “The metric should be F1, not accuracy”). The assistant rewrites the configuration for you.
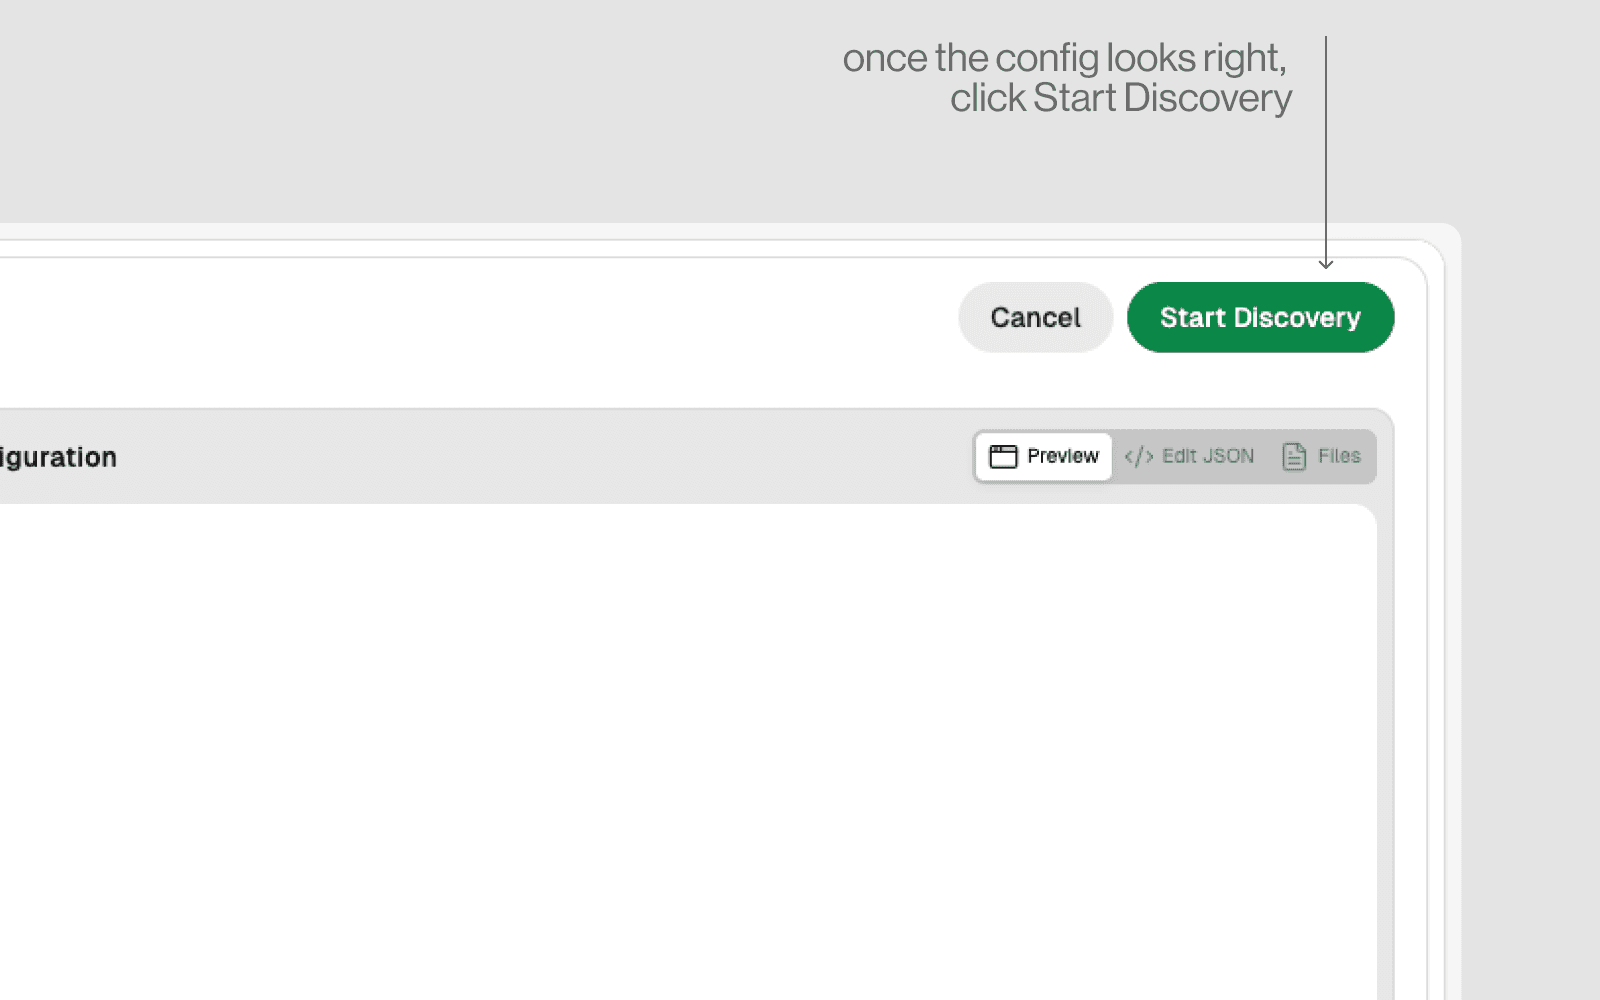
4. Only when you're happy, click Start Discovery (top-right).
TIP: Wait for the configuration to be shown and confirm it's correct. If it isn't, refine it through the chat.
Click Start Discovery only once you're happy with the configuration.
HEADS UP: Starting a discovery spins up a machine and may use compute credits. Click Cancel if you're only exploring. You can also edit the configuration later from the project's Configuration tab.
Open a project and click View Session to follow a discovery. Each idea the AI tries becomes a node;the best ones rise to the top. Switch views with the tabs.
Tree view — see how ideas branch
Each box is one experiment with its score. Higher scores = better results. Click any node to read a full report.
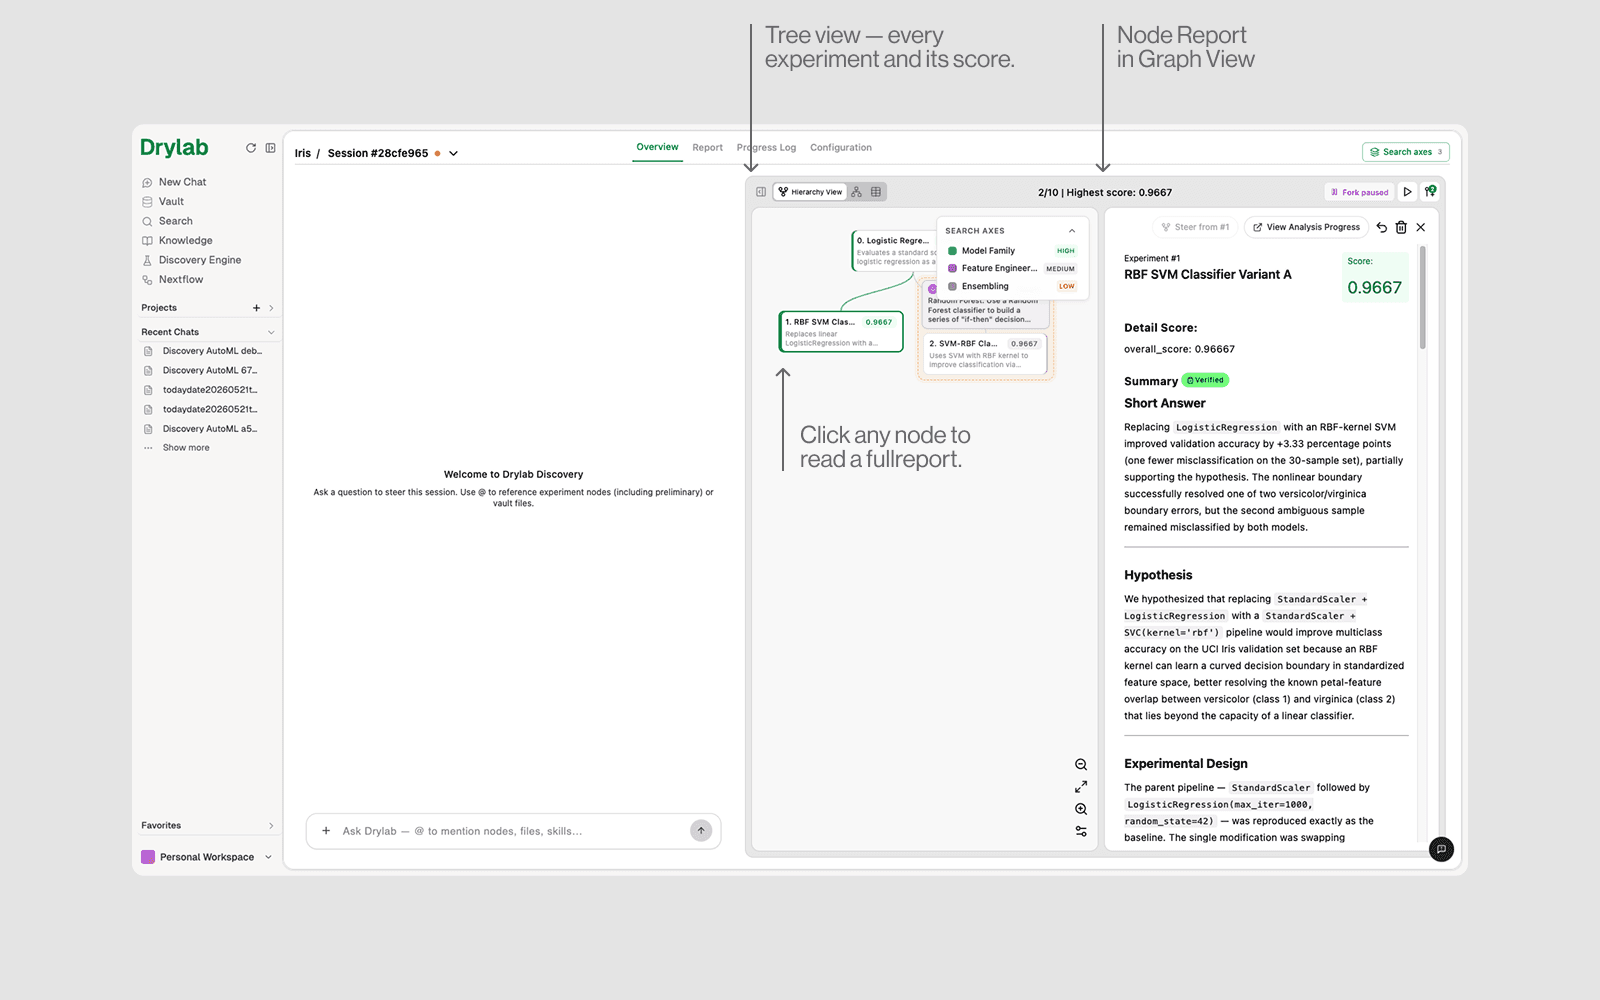
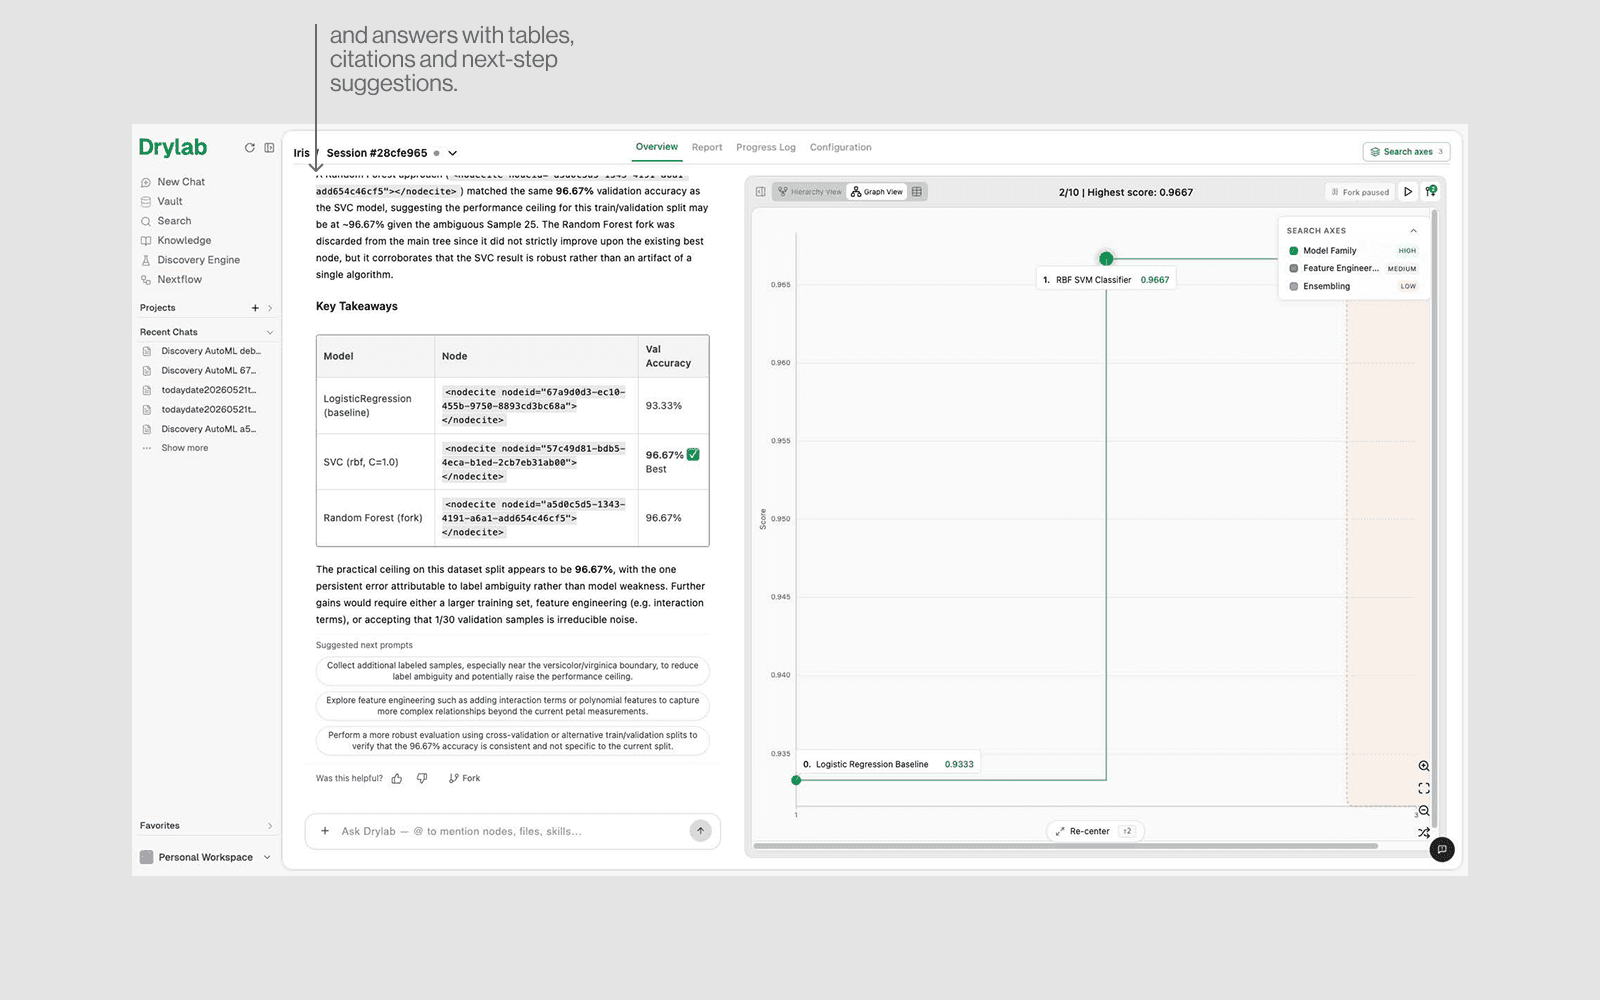
Node report — the full story
A clicked node shows the hypothesis, what was tried, the results and a plain-language verdict — plus buttons to Steer, Revert or Delete.
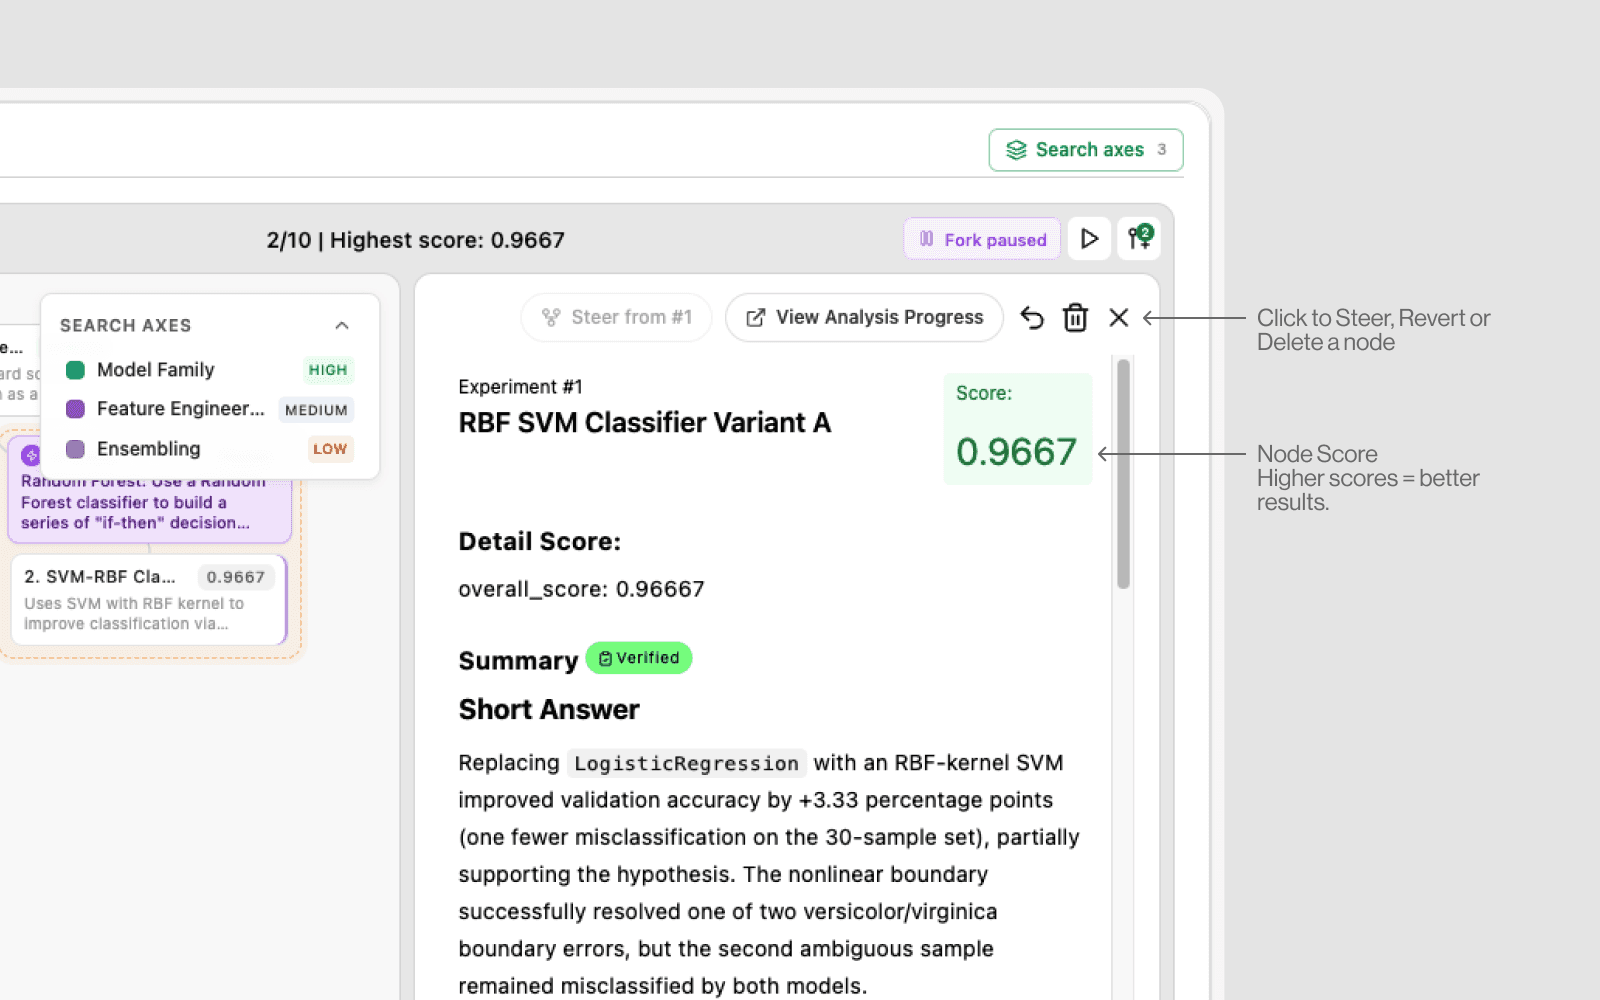
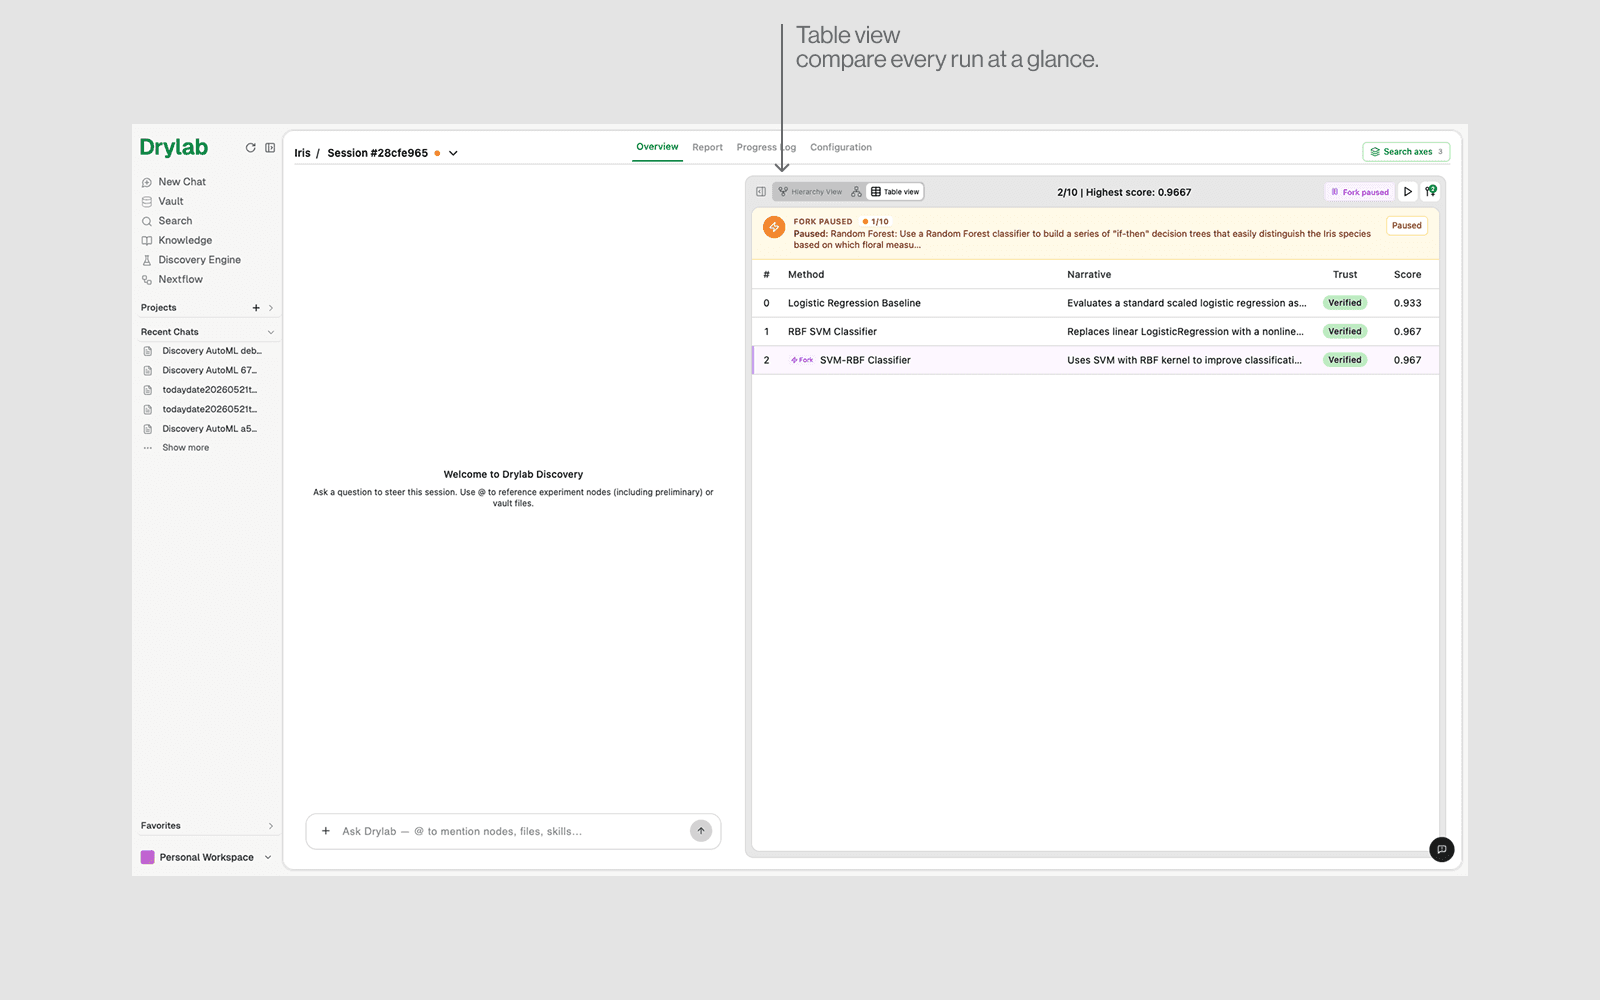
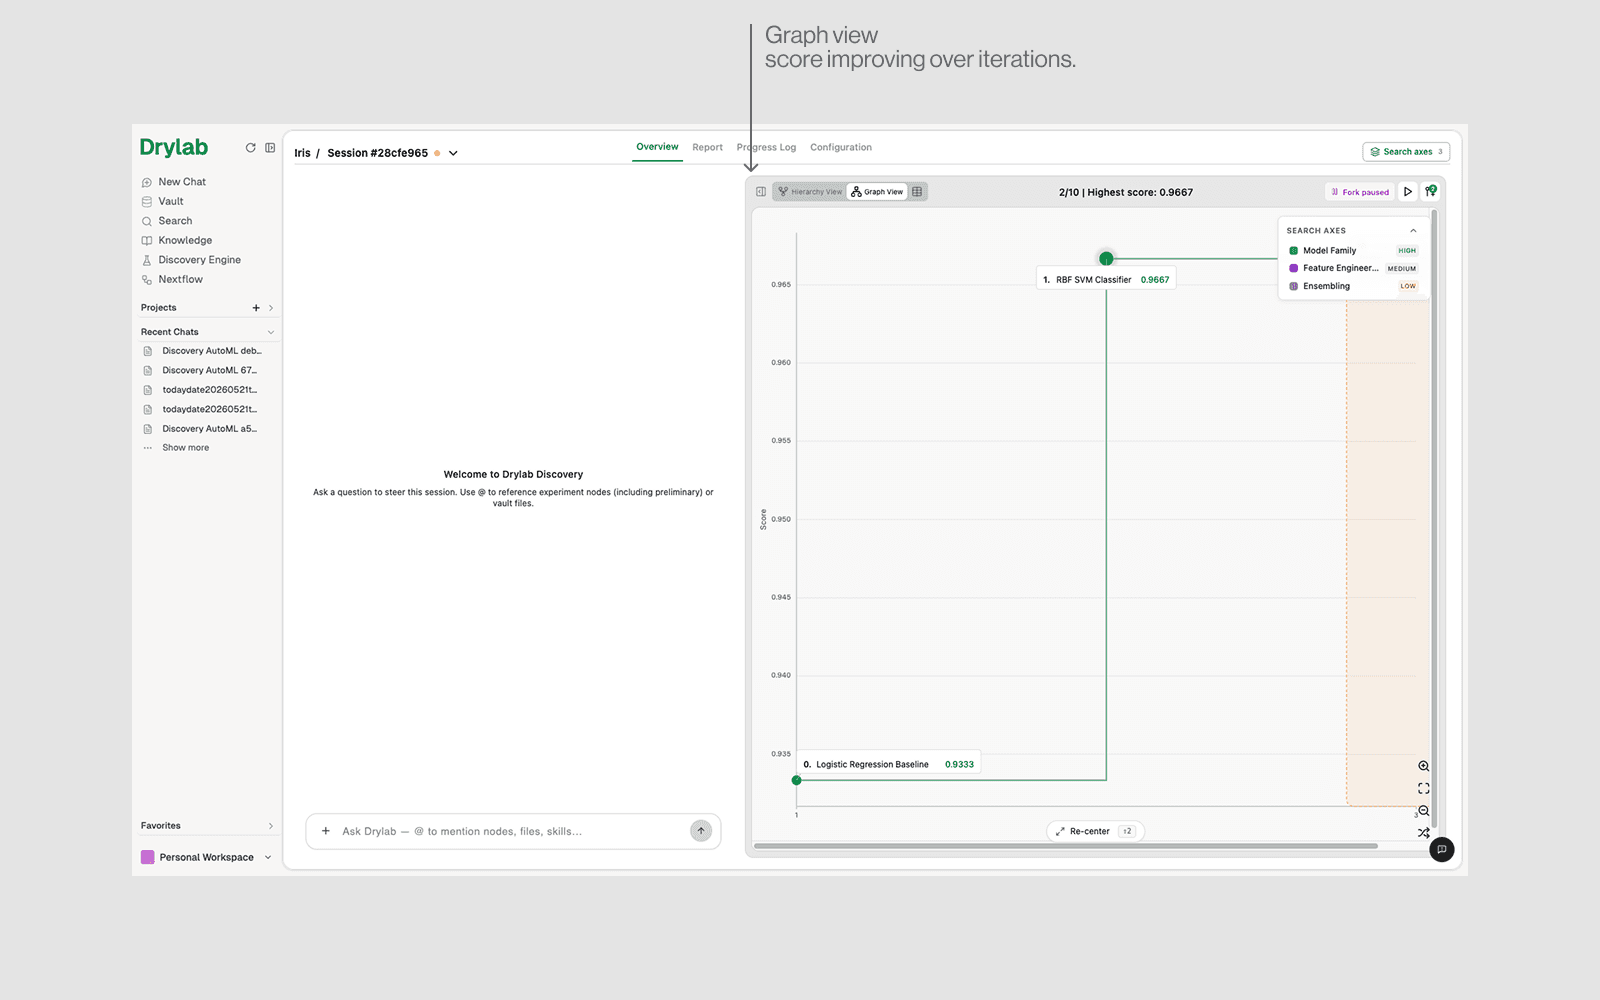
Table & Graph views
Prefer a list or a chart? Use the Table view to compare all runs, or the Graph view to see how the score improved over time.
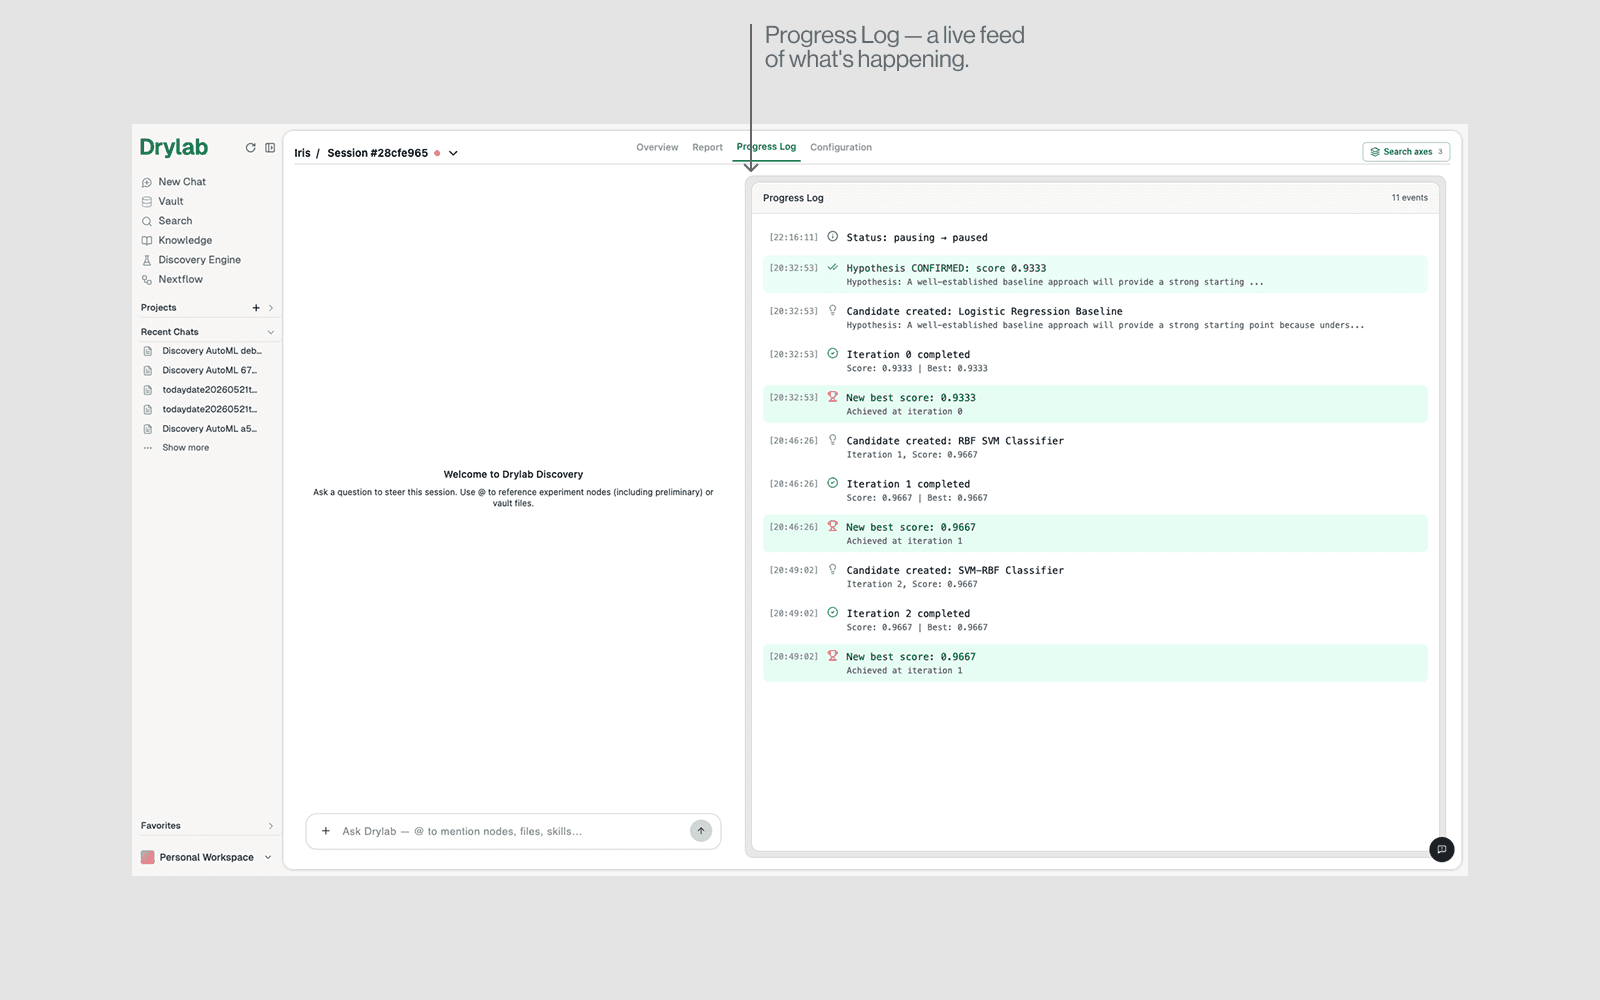
Report & Progress Log
Click Generate Report for a polished write-up, or open Progress Log to watch live, timestamped updates.
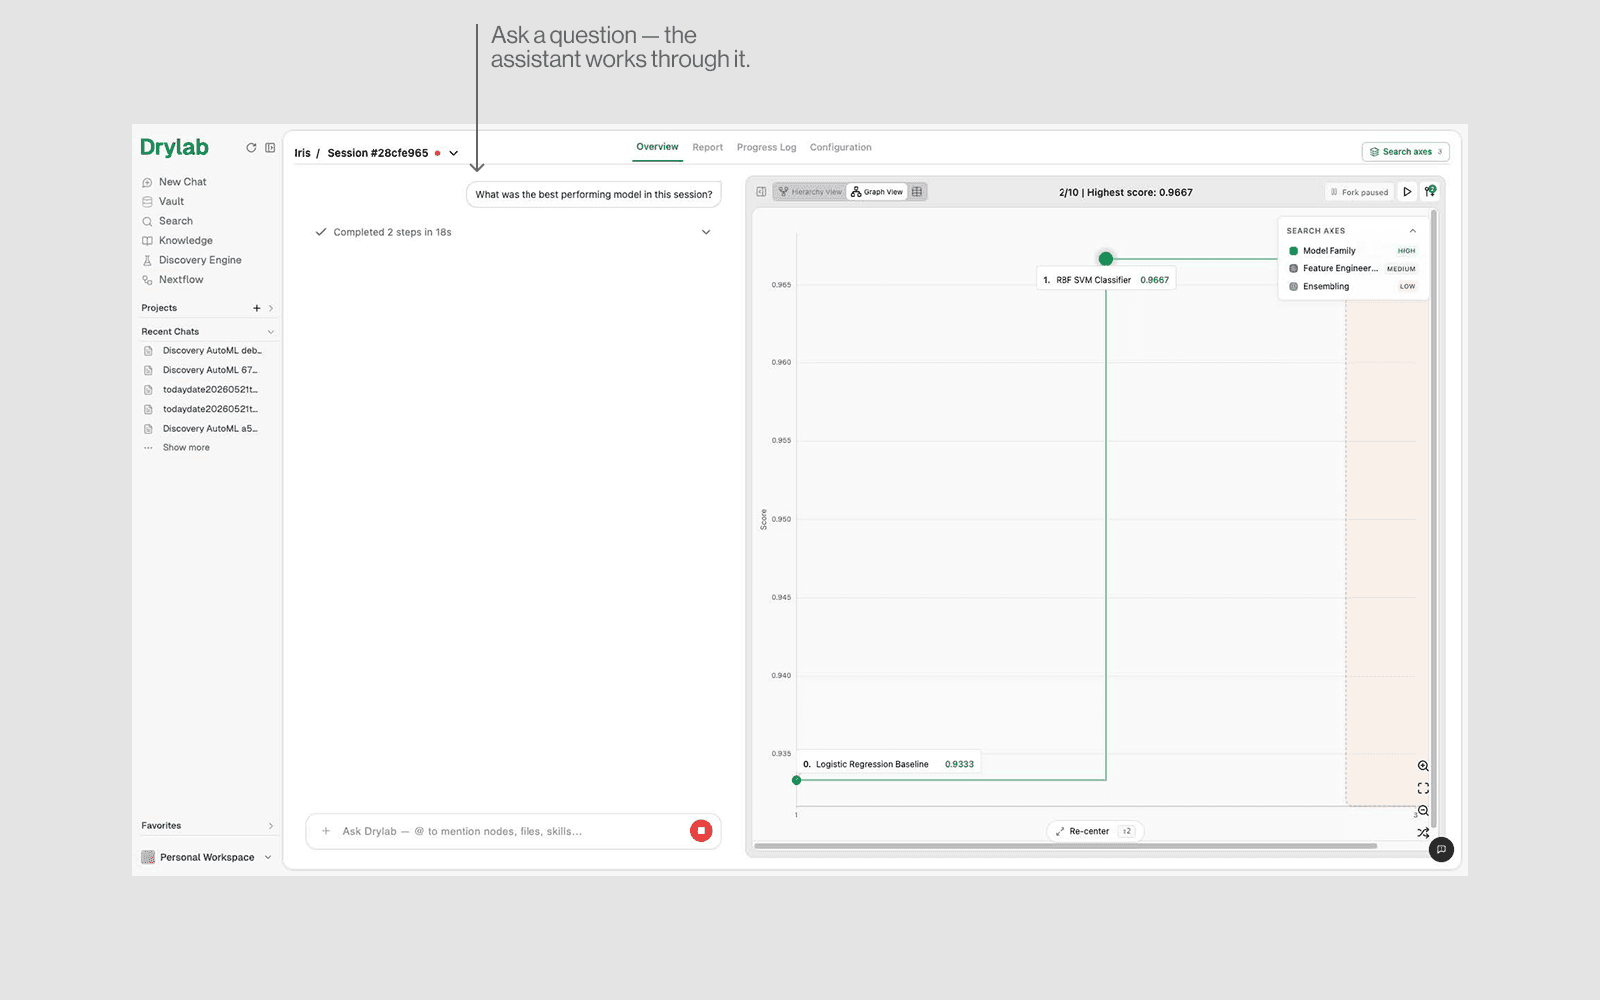
The chat panel on the left is how you guide the discovery. Ask about results, or tell it what to try next — it will queue new experiments for you.
Things you can say
• “What was the best performing model so far?”
• “Try a Random Forest next.”
• “Focus on feature engineering for the next 5 runs.”
• Type @ to mention a specific node, file or skill.
Quick-start recap
Step | Guide |
|---|---|
Create Project | Discovery Engine → Create Project → 5 steps |
Review config | Wait for the config → confirm it's correct → refine via chat if needed. |
Start Discovery | Click Start Discovery only once you're happy with the config. |
Review & steer | Open the session (Tree / Table / Graph) and steer via chat. |
